Computer Nook Renovation

Today, I'm so excited to share our computer nook renovation project! This is a project we actually finished a few months ago, but it has taken me some time to gather all of the pictures and compose this post. I wanted to be sure to give appropriate details to show how we went from the picture on the left to the picture on the right.
When we initially furnished our computer nook, we used a desk we had in our old place. It was a great, little secretary style desk that was compact and could be closed up when not in use. Above it, we made two floating shelves. From a visual perspective, it didn’t look neat. It bothered us that the cords were exposed and hanging all over the place. We had asked our builder to put the outlets and connections on the wall behind where the desk was to be positioned but that request was overlooked.
Last year, that desk broke. The bottom completely gave out and the paper and other items stored on that shelf were exposed, falling out from under the desk. When that happened, we knew we needed to get rid of that desk and do something else with the computer nook before our little crawler got into it. We also wanted to move the connections for the phones and Internet.
We had always discussed installing cabinets to look like built-ins. But, we needed to be mindful of our budget. We decided to go with our "built-in look", but do it as frugally as possible. Fortunately for us, our local big box hardware store was having a sale on ready to install cabinets. We purchased unfinished cabinets and decided to stain them ourselves.

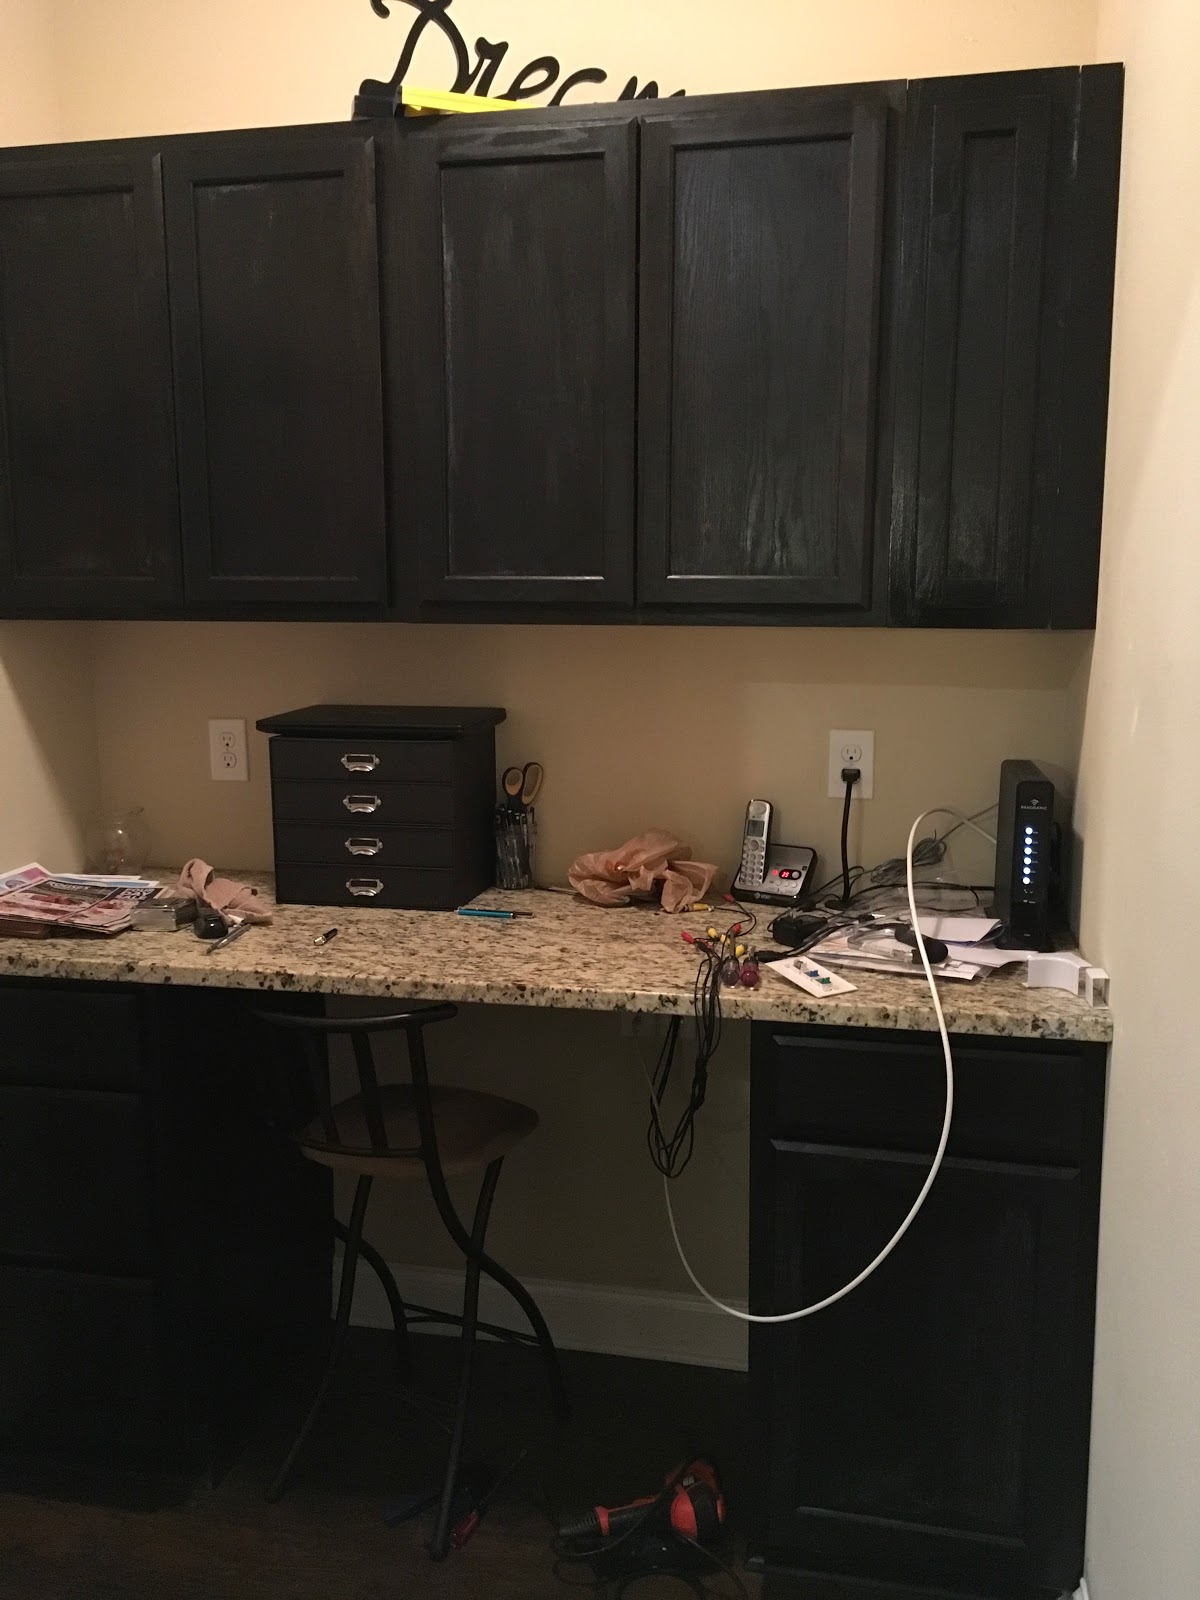
The area in the computer nook is 72" from stud to stud, not accounting for the width of the Sheetrock. Since we didn't have a full 72" to work with, we got two 30 x 30 wall cabinets. We found a 9 inch wall cabinet at our local Surplus Warehouse in the unfinished cabinets section. It seemed like a good idea at the time, but we learned something important here. Looking back, we would have purchased all of our cabinets from Surplus Warehouse. There were slight differences in the 9 inch cabinet that we hadn't noticed until we were actually installing it. From afar, no one can tell. The cabinets all look the same. But, we know that there are some little variations.This is a picture of the cabinets as we were making placement decisions. The cords hanging down to the right are for our home camera system.


The area in the computer nook is 72" from stud to stud, not accounting for the width of the Sheetrock. Since we didn't have a full 72" to work with, we got two 30 x 30 wall cabinets. We found a 9 inch wall cabinet at our local Surplus Warehouse in the unfinished cabinets section. It seemed like a good idea at the time, but we learned something important here. Looking back, we would have purchased all of our cabinets from Surplus Warehouse. There were slight differences in the 9 inch cabinet that we hadn't noticed until we were actually installing it. From afar, no one can tell. The cabinets all look the same. But, we know that there are some little variations.This is a picture of the cabinets as we were making placement decisions. The cords hanging down to the right are for our home camera system.

For the lower cabinets, we got one 18 x 35 base cabinet with three drawers and one 18 x 35 base cabinet with one drawer and a cabinet door. We set these two cabinets apart to create a knee space in between for the desk area.
The computer nook is just off the kitchen. We wanted the cabinets to match the Kraftmaid Peppercorn color as closely as possible, and we needed a style similar to our kitchen cabinets. This was one reason we needed to go with the unfinished cabinets. We couldn't find finished cabinets (that didn't need to be specially ordered) to match our existing dark cabinets.
To stain the cabinets we used Ebony color by Minwax. It's a traditional oil based stain. The color was a very close match to our kitchen cabinets.

After staining the cabinets, we attached them to the wall. For the end next to the 9 inch cabinet, we attached a filler piece that we had stained to match the cabinets. The picture below is not the best, the old lighting fixture did not adequately light up the space.
We ordered a remnant of granite from a local dealer to use as the work surface of the desk. They installed it for us and even cut a whole in the granite for us to place a grommet we had purchased for the cable and cords.
We removed the baseboards prior to installing the cabinets. Mr. C cut them down to fit precisely around the base cabinets. This is an important part in creating the look of built-in cabinets.
We removed the baseboards prior to installing the cabinets. Mr. C cut them down to fit precisely around the base cabinets. This is an important part in creating the look of built-in cabinets.
Mr. C moved all of the connections for us. It took him a full day in the attic because he had to troubleshoot a few things. But, he was able to get it done. I'm always impressed by his technical skills. He's quite smart, and we work well as a team when we complete all of these home projects. The picture below was taken before we fed all the cables through the grommet.
I also wanted to put some additional lighting under the cabinets. I found these battery operated LED lights and decided to mount them under the cabinets using Command picture mounting strips. I use Command strips for everything honestly. We put two long light bars under the two larger cabinets, and one smaller light bar under the small wall cabinet.

Here's a picture of the Little Mister admiring the under cabinet lighting. He loves his new place to do homework.

For the walls, I wanted a color that would compliment our existing wall color, which is currently in the beige family. We went with Benjamin Moore Glass Slipper (#1632) in an eggshell finish. On the website it looks more green, but it has a blue undertone. I must say, I am in love with this color! I'm sure this is going to sound weird, but it just feels like "home". It's bright and airy, in a space with no windows and no natural light. And, it proved to be the perfect neutral for our area. And, I like the consistency and even coverage of the Benjamin Moore paint.

Here's my test section. I painted a larger section to sample the color to get an idea for the how it would look in different views of light. I also left the coat hanger on the wall to see how the color would look right next to it.I liked the look. By the way, I found the coat hanger and the floating shelf above it (you will see that in later pictures) at Target.


We purchased this Savavieh Madison rug in navy and ivory from Home Depot. Again, since the area was small, I only needed one that was 3 x 5. We scored this one for under $40 including shipping costs!
To fix our lighting issue, we changed out the original dome fixture. It made the space dark and did not provide adequate light. So, we purchased the round track lighting fixture from Lithonia Lighting.
Above the cabinets, I made a reverse canvas print to consume some of the empty space. That was actually a Cricut project. I also ordered a canvas print of the kids to put next to the reverse canvas. I chose to go with all black and white accents in the computer nook. It turned out to be an awesome choice, I think.
On the counter I placed the printer all the way to the left. Beside it, I put some stacking black boxes I found at Wal-Mart that we use to sort mail and important papers as they come in for each of our family members.

For now, we are using a bar stool type chair from our kitchen island. Eventually, I would like to replace that with a drafting chair. Since we used the kitchen cabinets, the desk is a bit taller than your standard desk height.
On the opposite wall, we have our "Command Center". It's where we keep a bulletin board with important notes, our family calendar and I keep a chalkboard for the kids to play on or us to write notes to each other.

Finally, here is a view of the wall with the coat hanger. This makes the space more functional for us because we don't have a coat closet for guests to put their jackets and purses in when they enter our home. This hanger gives us a space to put items for our guests, as well as for ourselves. You can see my laptop bag and the Little Mister's backpack hanging there in the picture below. The black and white artwork on the floating shelf above, I framed myself. I did have to get a special mat cut for the 8 x 8 picture.
All in all, this is one of my favorite home projects thus far. We are so happy about how it turned out!

Disclaimer: This post is not sponsored by any of the companies mentioned. Names are only mentioned to tell you where the products we used can be found.


Comments
Post a Comment