Posts

Showing posts with the label Backyard Antics

Rejuvenating the Play Set
Image
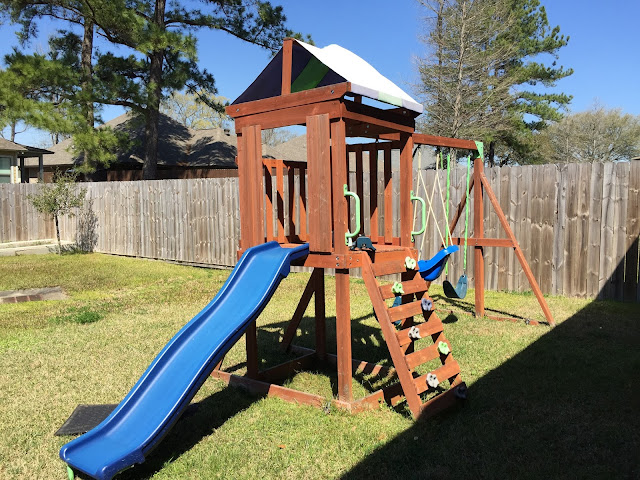
Our son, the Little Mister, has had this wooden play set for about three years now.  He loves it!  This Denver Wooden Swing Set was a gift from Santa his very first Christmas.  It sits in our backyard where there is sun beaming on it for most of the day.  Although it is still a rather new unit, it had started to fade pretty badly.  And, the fabric over the fort was torn at the top, from years of waving in the wind. We knew it needed a refresh.  So, we decided to stain it and change the fabric over the fort.  We were able to do everything in one weekend.  For this project, we enlisted the help of my brother and my husband's teenage cousin.  She did a perfect job getting into the hard to reach nooks and crannies we struggled to get to with our old backs and knees. The first step to this refresh was to remove the slide and swings from the unit.  We removed all the hardware from the wood, except the adjoining plates on the top corn...
Making Patio Pavers

Image
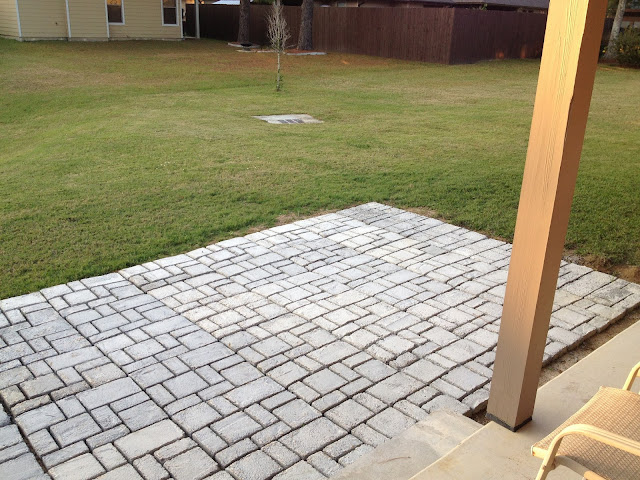
Here is what our patio looked like when we started after prepping the ground .  It was still a work in progress.   We decided to make pavers for the patio using a mold.  This is a mold made by Pathmate in the Belgian style.  This seemed to be the simplest method for creating the patio.  By using the mold we saved money on the purchase of individual pavers, and saved time because we did not have to design and layout a pattern.  To use the mold, we simply mixed concrete and poured it into the form.  Smooth off the top of the mold.  We allowed the concrete to set for a couple of minutes.  Then, gently we removed the mold. This is how it looked when the mold was filled with concrete. After letting it sit, we lifted the mold. You can move on to the next mold setting immediately after lifting out the mold. This is how the pavers looked as we moved along. This project obviously took several days to complete.  We di...

Prepping for a Patio

Image
This is one of the major projects we have been working on the past few weeks.  Since moving into our house, we have discussed this patio.  We have spent a great deal of time planning the entire outdoor living space.  This space will be done in stages.   The first stage is laying a patio with pavers.  The second stage will consist of us building an overhead cover.  We are still working out the design elements and a plan of execution for that stage.  The third and final stage will be to build an outdoor kitchen area.  Because there is a pond behind our house, we would like to create a place where we can not only barbecue, but also clean and cook any fish we catch.  About a month ago we finally began working on phase one of the backyard, the patio.  The hardest part of this project is leveling the ground.  The first thing we did was mark the area with stakes. Then, we had to dig up the sod.  At first, Mr. C thought he co...

Early Girls Gone Bye

Image
Considering my Early Girl tomatoes were doing so well at the beginning of the season , they have now died.  Well, I think they would have still been thriving had we not gone on vacation.  We went out of town for about six days earlier this summer.  It seems when we returned, they were goners.  I tried to think of what could have gone wrong.  Here are a few ideas that could have been factors: It was at least 100 degrees everyday while we were out of town.  The plant most likely needed additional watering to accommodate for the dryness of the soil. I never got around to purchasing a cage, which might have helped support the vines as they grew.  I am not sure if this was truly a factor in my failure to keep the plant alive as the plant never got really tall.  I also, never put any additional plant food after the initial soil.  I should have provided more nutrients for the plant.  I'm pretty sure this was a big contributing fac...

Porch Seat

Image
Our backyard needs work, I will be the first to admit it.  It is definitely a work in progress.  One idea I saw on Pinterest was a seat made out of cinder blocks, a cushion and pillows.  Here is the picture I saw, it was featured in Better Homes and Gardens. In an attempt to replicate this look, but modify it to fit our space on the back porch, we purchased 21 cinder blocks.  For the cushion, I purchased a couple of yards of 2 inch thick foam.  The foam was on sale at Joann's Fabrics, so I was lucky enough to get it half off.  I also purchased 2 1/2 yards of duck cloth to cover the foam seat for the bench.  You will also need thread. Stack the cinder blocks in a pattern that will result in a rectangular shape. The original idea featured in Better Homes and Gardens was much longer than I wanted ours to be.   As a result, I had to rework the stacking pattern of the cinder blocks. Here is an illustration of the pattern used: NOTE:  The...