Posts

Showing posts with the label Furniture

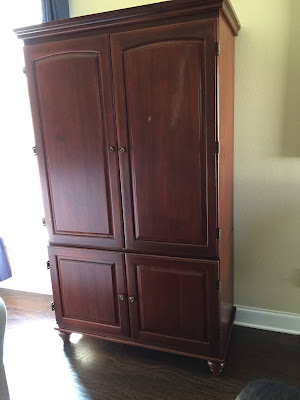
Additional Kitchen Storage
Image
Our kitchen is a little small, and I need lots of kitchen storage.  So, I came up with a solution to my problem of not having enough space to put everything.  I came across this pretty armoire on Craigslist. The shape and size was perfect for what we needed.  It was simply the wrong color to match our kitchen cabinets and the other furniture in our living room area.  So, I knew I would have to stain it. Deciding what stain to use and how to use it was my first major hurdle.  I wondered if spray painting it was the best bet, given it would provide a similar look to our kitchen cabinets.  But, honestly, I could not really find too many examples online of spray painted wood in an espresso color or something of the like.  Most of the examples of spray painted wood pieces were of bright vibrant colors, none of which I wanted for our armoire. In my research, I came across the Young House Love post where they stained the cabinets in their kitchen ...

Towel Storage

Image
When our house was built, we didn't pay attention to the fact that our master bathroom did not include a linen closet.  Mr. C says he mentioned it once, but I don't remember him mentioning it.  We were a little green about building and although we did ultimately invest in a few upgrades, we did not want to go overboard.  So, when he made mention of adding a linen closet, I'm sure we tabled that idea in favor of keeping our costs lower. For years, we used one of those flimsy metal towel racks that goes over the toilet.  Except, we didn't have ours over the toilet.  We had it against a wall in our bathroom.  It served the purpose of storing our towels.  But, it wasn't the nicest thing to look at in our bathroom.  I bought a couple of bathroom cabinets in the past, but they were all too short for our 8 foot ceilings.  And, they didn't look good in such a big bathroom. I had been on a search to find the perfect piece.  For the last tw...

Nursery Project: Assembling the Ikea Henmes 3 Drawer Chest

Image
Have you ever heard people say that assembling Ikea furniture will test your relationship?  Well, I have, and that is certainly true.  Good news, we survived the test! We took pictures as we embarked on this adventure. This tutorial is meant to provide a visual supplement to the Ikea instructions. It in no way serves as a replacement for the actual instruction booklet that came with the product.  The instruction booklet has no verbal instructions, just illustrations, so you may find this helpful. The best thing to do when starting on a project like this is to lay out all of the pieces grouped together by likeness. This will help you count to verify you have all pieces necessary to put together the furniture, but also helps to identify the pieces in the instructions. Not all companies are kind enough to label the parts and pieces as they are labeled in the instructions.  The first step was to lay out all of the legs, known as pieces L1, L2, R1 and R2. Then s...

Entertainment Console

Image
This is the big project I was referring to in yesterday's post.  We purchased this wood cabinet from a seller on Craigslist.  It was the right size and shape we needed for our entertainment center.  The price was a steal.  I am pretty positive the seller just wanted someone to take this off his hands.  Here are a few shots of the cabinet. The previous owner had cut a hole on the left side of the piece, I'm guessing for cables and cords.  Since we want to camouflage all of our cords, and plan to run them throughout the back of the piece, we wanted to cover this hole. We used wood filler to seal up the hole on the left side of the piece. Since we were going to leave it open in the middle and not replace the door, we also used wood filler to cover the holes from the hinges of the middle door. This is a solid cabinet, heavy and sturdy, but a bit overwhelming for our living room as is. We wanted to make some changes to it, open it up a bit ...