Posts

Showing posts with the label Painting

Nursery Project: Painting and Re-Painting

Image
As I mentioned before, we are preparing for the birth of our first child.  Since we are having a boy, Mr. C wanted to do the nursery using a New Orleans Saints theme.  He is a huge Saints fan.  To accomplish this, we wanted to paint the walls a brown color and accent the room with black and white.  The furniture is all black. The crib was ordered from Babies R Us online.  It is the Tuscany crib in black by Storkcraft.  This is a 4 in 1 convertible crib, meaning it converts to a toddler bed, as well as a full size bed.  This crib comes in several other color options, but black worked best for the look we were trying to achieve. While strolling through Ikea one day, we came across this dresser.  We purchased the Hemnes 3 drawer chest in black brown.  We plan to also use it as a changing table by adding a changing pad on top of it.  Now here comes the fun part, painting the room.  When our house was built, all ...

Decorative Glass Vases

Image
I first saw these on Pinterest.  After a little more searching, I came across Martha Stewart's instructions for painting glass.  It can be found here . First use some surface conditioner for glass paint.  It seems exactly like rubbing alcohol, I may actually try using rubbing alcohol instead the next time I paint glass.  Then, pour in some of the enamel acrylic paint and swirl it around the entire interior surface of the glass.  I actually used a brush to kind of spread it around some more near the mouth of the vase.  Then, simply flip the vase upside down on stacks of newspapers.  The excess paint will drip down to the top of the vase.  This should cover any streaks left from the use of the brush. Once fully covered, but not yet completely dry, wipe the rim of the vases and let dry.  Let them dry for about a day.

Laundry Room Cabinets

Image
We wanted to install cabinets in our laundry room above our washer and dryer.  Since we were unable to find cabinets at Lowes or Home Depot to match the color of the cabinets in our house, we decided to paint unfinished cabinets.  This proved to be a very economical option also. Measure the area in which you want to hang the cabinets.  This step is important because although you think a space is a certain width, the actual dimensions may be slightly off.  You have to account for the thickness of Sheetrock between the studs.  Our space was too small for two 36 inch wide cabinets, so we had to get two 30 inch cabinets.  We decided we would customize our space to account for the difference with shelves or a rod for hanging clothes. More than a tutorial on how to actually hang the cabinets, this is how to get them to look like they came from the factory with the color you desire.  For us, it was a deep Walnut brown spray paint.  The first step i...

Chevron Canvas Art

Image
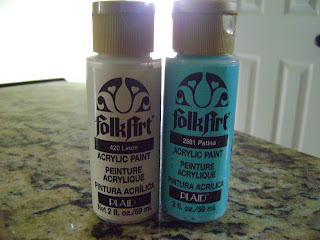
In searching the internet, I came across the House of Smiths blog.  I love what she has going on over there, especially her chevron rug tutorial.  It can be found here . Here at our home, I had no place for a beautiful rug like that.  However, I knew I wanted to figure out a way to incorporate that chevron pattern somewhere in our decor.  Since we are still working on putting our master bedroom together, I thought we could apply the same technique to canvas and use it as wall art. We used acrylic paint in two colors, Linen and Patina, both by Folk Art. First, we painted the entire canvas with the Linen paint.  Then let it dry. The next step was to create a stencil for our design.  We created our stencil using wide width masking tape.  If you don't have wide width masking tape (about 2 inches wide), you can always use regular masking tape and double up the lines of the stencil you are creating.  This part took the longest b...

Making Art with Fabric

Image
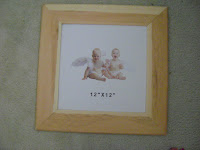
Here is a DIY wall art idea.  I wanted some artwork that would bring in the pattern of my throw pillows.  I had heard of covering canvas in fabric and even framing fabric before, but I wondered how it would come out to using those unfinished frames from Hobby Lobby.  I had not really seen anyone attempt to stain them, but it sounded fairly easy. These are the supplies I used:  unfinished wooden 12 x 12 frames from Hobby Lobby, a half of a yard of fabric from Hobby Lobby (this was later cut along the center line to make two pieces), Minwax stain (in whatever color you decide), a sanding block and a brush. First, I used the sanding block to smooth the rough sides of the frame.  Once the frames were completely smooth to the touch, the stain was applied with the paintbrush.  I did not use primer for this project, thinking I could skip this step.  That was not my best idea.  Primer should have been used here....

Old Has Become New

Image
Mr. C and I have recently moved.  We have been trying to figure out how to decorate each room in a way that is both functional and pleasing to the eye.  Since it is just us, we have two guest rooms right now.  So I needed to create a space for doing crafts and sewing.  Instantly I thought of a craft table.  So I scoured Craigslist and found a local flea market that had an old butcher block style kitchen table.  It was only $40 and a little scratched up, but that didn't matter because I knew I wanted to paint it black anyway.  I used Rustoleum products.  No, this post is not sponsered by them.  They, in fact, have no idea of who I am.  However, I have used these products in the past and found them to work well.  I used the gray primer and black semi-gloss paint. First I primed the piece with the spray primer.  That stuff is so easy to use.  Especially if you get one of those triggers for the spra...